Cyclr Community
  • Forums
  • Tutorials
  • Documentation
    • User Documentation
    • Connector Guides
  • Resources
    • New Features
    • Blog
    • Changelog
    • Support Portal
    • Newsletter Archive
    Sign in
    Cyclr Logo
    Cyclr Logo
    • Forums
    • Tutorials
    • Documentation
      • User Documentation
      • Connector Guides
    • Resources
      • New Features
      • Blog
      • Changelog
      • Support Portal
      • Newsletter Archive

    About Cyclr

    6
    • Introduction to Cyclr
    • Minimum requirements
    • Glossary
    • Errors
    • IP Allow List
    • Legal notices

    Cyclr Console

    14
    • Partner Console Dashboard
    • The Builder
    • Reports
    • Console Configuration
    • General Settings
    • Notifications
    • Embedding Customization
    • Security settings
    • Data retention settings
    • Custom Service Domains
    • Handle transaction errors
    • Payload Size Limitations
    • Performance tips
    • GitHub Integration

    Connectors

    33
    • Introduction to Connectors
    • Connectivity Comparison
    • Connector Guides
    • Application Connectors
      • Introduction to Application Connectors
    • Utility Connectors
      • Introduction to Utility Connectors
      • Counter Storage
      • Cross Updating Preventer
      • Data Tools
      • Entity Cross Ref Storage
      • Generic File
      • Generic File Downloader
      • Generic Form
      • Generic Webhook
      • Data Storage
        • Introduction to Data Storage Connectors
        • Global Data Storage
        • Global Object Storage
        • Cycle Data Storage
        • Cycle Object Storage
    • Custom Connectors
      • Introduction to Custom Connectors
      • Methods
      • Triggers
      • Last Successful Run Date
      • Parameters
      • Scripting
      • Data Types
      • Paging
      • Custom Objects
      • Dynamic Custom Fields
      • Automatically Install Webhooks
      • Connector Standards
      • Settings
      • Authentication
      • Rate Limits

    Templates

    17
    • Introduction to Templates
    • Template Settings
    • Create a Template
    • Tools
    • Connectivity Tools
    • Map fields
    • Add Custom Fields
    • Custom Object Method Categories
    • Test Scripts
    • Collection splitting
    • Pass data between two steps
    • Test a template
    • Template versioning
    • Introduction to Cycles
    • Stop a cycle
    • Copy Cycles as Templates
    • Import or Export Templates

    Accounts

    5
    • Introduction to Accounts
    • Account Users
    • Sub Accounts
    • Connector Authentication Link
    • Export or Import Cycles

    Embedding

    17
    • Introduction to Embedding
    • ORBIT
    • Installing a Partner Connector
    • Embed Cyclr in an iFrame
    • Launch
      • Introduction to Launch
      • User Experience
      • Customize Appearance
      • Build Compatible Templates
      • Handle LAUNCH callbacks
      • Deploy LAUNCH
    • Marketplace
      • Introduction to Marketplace
      • Set up a Marketplace
      • Styling Marketplace
      • Deploying a Marketplace
      • Marketplace Callback
      • Marketplace Webhook Callback
      • Marketplace Settings

    API

    19
    • Introduction to the Cyclr API
    • Authentication
    • Authorize Account API calls
    • Install Connectors into an Account
    • Install a Cycle from a Template
    • Step Setup
    • Activate a Cycle
    • Install Connectors
    • Create an Account
    • API Example Walkthrough
    • Connector Authentication
      • Introduction to Connector Authentication
      • API Key Authentication
      • HTTP Basic Authentication
      • OAuth Authentication
    • Data on Demand
      • Introduction to Data on Demand
      • Get Account Connectors
      • Get Connector Methods
      • Call a Connector Method
      • IP Restriction

    Release Notes

    28
    • Introduction to Release Notes
    • 2025
      • 2025-06
      • 2025-05
      • 2025-04
      • 2025-03
      • 2025-02
      • 2025-01
    • 2024
      • 2024-12
      • 2024-11
      • 2024-10
      • 2024-09
      • 2024-08
      • 2024-07
      • 2024-06
      • 2024-05
      • 2024-04
      • 2024-03
      • 2024-02
      • 2024-01
    • 2023
      • 2023-12
      • 2023-11
      • 2023-10
      • 2023-06
      • 2023-05
      • 2023-04
    • Archive
      • Archive
      • 2022
      • 2021
    View Categories
    • Home
    • Documentation
    • Embedding
    • Launch
    • User Experience

    User Experience

    1 min read

    You can use LAUNCH to guide your users through the process to set up an integration between your application and third party applications. This means that your user only has to provide information that you can’t include with the template.

    For example, you can use a template for an integration that exports contacts from your application to your user’s email marketing platform. Through LAUNCH, you can allow your user to select the mailing list to add contacts to.

    Indicate intent to integrate with a 3rd party app #

    You can present your users with the option to install an integration. This can be as simple as a button labeled Connect, or a link within your application.

    Select Template to install #

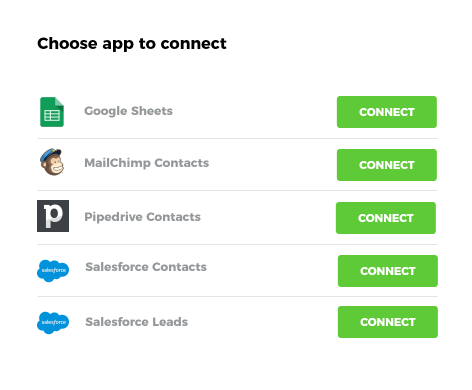
    When your user selects the link, LAUNCH opens a browser popup which displays a list of valid Templates they can install.

    If there is only one Template that applies to the user, the user can skip this screen.

    Authenticate third party connectors #

    After the user selects an integration to install, LAUNCH takes them through the steps to authenticate each third party connector that the integration template uses. This screen depends on the authentication type that the connectors use.

    If the user has already authenticated a connector when they installed another integration, then the user doesn’t need to re-authenticate.

    Step setup #

    LAUNCH presents the user with a screen to allow them to set up each step in the integration template that needs the user to select parameters.

    • Your user might need to select from a list of values from an authenticated connector in the integration template. For example, they might have to select a Mailing List from their email marketing platform.
    • Your user might need to select a value from a predetermined list of valid values. For example, an email contact status: Subscribed or Unsubscribed.
    • Your user might need to provide text values for complete flexibility. For example, this could be the source of an email lead.

    Return to host app #

    When the user completes the setup of their integration, LAUNCH presents the user with a screen that you can customize:

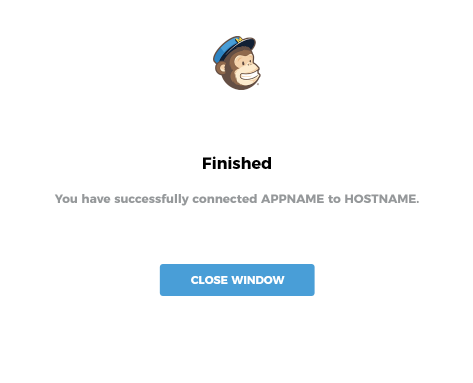
    To customize this screen, you can include your own HTML and JavaScript. For more information, see the page on how to Customize LAUNCH. You usually then return your user to your application.

    LAUNCH provides response values that allow you to update your UI to indicate success, or instigate a backend process to make use of the newly installed Cyclr.

    Share This Article :
    • Facebook
    • X
    • LinkedIn
    • Pinterest
    Introduction to LaunchCustomize Appearance
    Page Contents
    • Indicate intent to integrate with a 3rd party app
    • Select Template to install
    • Authenticate third party connectors
    • Step setup
    • Return to host app

    Company

    • Company
    • About Us
    • Security and Compliance
    • Pricing
    • Blog
    • Branding
    • Embedded iPaaS

    Legal

    • Website Terms
    • Privacy Policy
    • Terms and Conditions
    • Data Protection Agreement
    • SLA
    • GDPR

    UK Office

    +44 (0) 3300 102 525

    US Office

    +1 (646) 585-2525


    White labelled API integration framework for creating & managing in-app SaaS integrations.

    © 2025 Cyclr. All rights reserved.