Cyclr Community
  • Forums
  • Tutorials
  • Documentation
    • User Documentation
    • Connector Guides
  • Resources
    • New Features
    • Blog
    • Changelog
    • Support Portal
    • Newsletter Archive
    Sign in
    Cyclr Logo
    Cyclr Logo
    • Forums
    • Tutorials
    • Documentation
      • User Documentation
      • Connector Guides
    • Resources
      • New Features
      • Blog
      • Changelog
      • Support Portal
      • Newsletter Archive

    About Cyclr

    6
    • Introduction to Cyclr
    • Minimum requirements
    • Glossary
    • Errors
    • IP Allow List
    • Legal notices

    Cyclr Console

    14
    • Partner Console Dashboard
    • The Builder
    • Reports
    • Console Configuration
    • General Settings
    • Notifications
    • Appearance settings
    • Security settings
    • Data retention settings
    • Custom Service Domains
    • Handle transaction errors
    • Payload Size Limitations
    • Performance tips
    • GitHub Integration

    Connectors

    33
    • Introduction to Connectors
    • Connectivity Comparison
    • Connector Guides
    • Application Connectors
      • Introduction to Application Connectors
    • Utility Connectors
      • Introduction to Utility Connectors
      • Counter Storage
      • Cross Updating Preventer
      • Data Tools
      • Entity Cross Ref Storage
      • Generic File
      • Generic File Downloader
      • Generic Form
      • Generic Webhook
      • Data Storage
        • Introduction to Data Storage Connectors
        • Global Data Storage
        • Global Object Storage
        • Cycle Data Storage
        • Cycle Object Storage
    • Custom Connectors
      • Introduction to Custom Connectors
      • Methods
      • Triggers
      • Last Successful Run Date
      • Parameters
      • Scripting
      • Data Types
      • Paging
      • Custom Objects
      • Dynamic Custom Fields
      • Automatically Install Webhooks
      • Connector Standards
      • Settings
      • Authentication
      • Rate Limits

    Templates

    17
    • Introduction to Templates
    • Template settings
    • Create a Template
    • Tools
    • Connectivity Tools
    • Map fields
    • Add custom fields
    • Custom Object Method Categories
    • Test Scripts
    • Collection splitting
    • Pass data between two steps
    • Test a template
    • Template versioning
    • Introduction to Cycles
    • Stop a cycle
    • Copy Cycles as Templates
    • Import or Export Templates

    Accounts

    5
    • Introduction to Accounts
    • Account Users
    • Sub Accounts
    • Connector Authentication Link
    • Export or Import Cycles

    Embedding

    17
    • Introduction to Embedding
    • ORBIT
    • Installing a Partner Connector
    • Embed Cyclr in an iFrame
    • Launch
      • Introduction to Launch
      • User Experience
      • Customize Appearance
      • Build Compatible Templates
      • Handle LAUNCH callbacks
      • Deploy LAUNCH
    • Marketplace
      • Introduction to Marketplace
      • Set up a Marketplace
      • Styling Marketplace
      • Deploying a Marketplace
      • Marketplace Callback
      • Marketplace Webhook Callback
      • Marketplace Settings

    API

    19
    • Introduction to the Cyclr API
    • Authentication
    • Authorize Account API calls
    • Install Connectors into an Account
    • Install a Cycle from a Template
    • Step Setup
    • Activate a Cycle
    • Install Connectors
    • Create an Account
    • API Example Walkthrough
    • Connector Authentication
      • Introduction to Connector Authentication
      • API Key Authentication
      • HTTP Basic Authentication
      • OAuth Authentication
    • Data on Demand
      • Introduction to Data on Demand
      • Get Account Connectors
      • Get Connector Methods
      • Call a Connector Method
      • IP Restriction

    Release Notes

    27
    • Introduction to Release Notes
    • 2025
      • 2025-05
      • 2025-04
      • 2025-03
      • 2025-02
      • 2025-01
    • 2024
      • 2024-12
      • 2024-11
      • 2024-10
      • 2024-09
      • 2024-08
      • 2024-07
      • 2024-06
      • 2024-05
      • 2024-04
      • 2024-03
      • 2024-02
      • 2024-01
    • 2023
      • 2023-12
      • 2023-11
      • 2023-10
      • 2023-06
      • 2023-05
      • 2023-04
    • Archive
      • Archive
      • 2022
      • 2021
    View Categories
    • Home
    • Documentation
    • Cyclr Console
    • The Builder

    The Builder

    4 min read

    The builder provides a visual, drag-and-drop interface for constructing integrations within Cyclr. Steps can be added, configured, and connected to define the logic and data flow of an integration Template or Cycle.

    You can access the Builder in a few ways:

    • In the Partner Console, to work on Templates:
      • From the Console Dashboard, select “Design New Template”
      • From the Template Library, select “Create New Template”, or “Edit Template”
    • Inside Accounts, to work on a Cycle:
      • In Cycles, select “Design New Cycle” or “Edit Cycle”
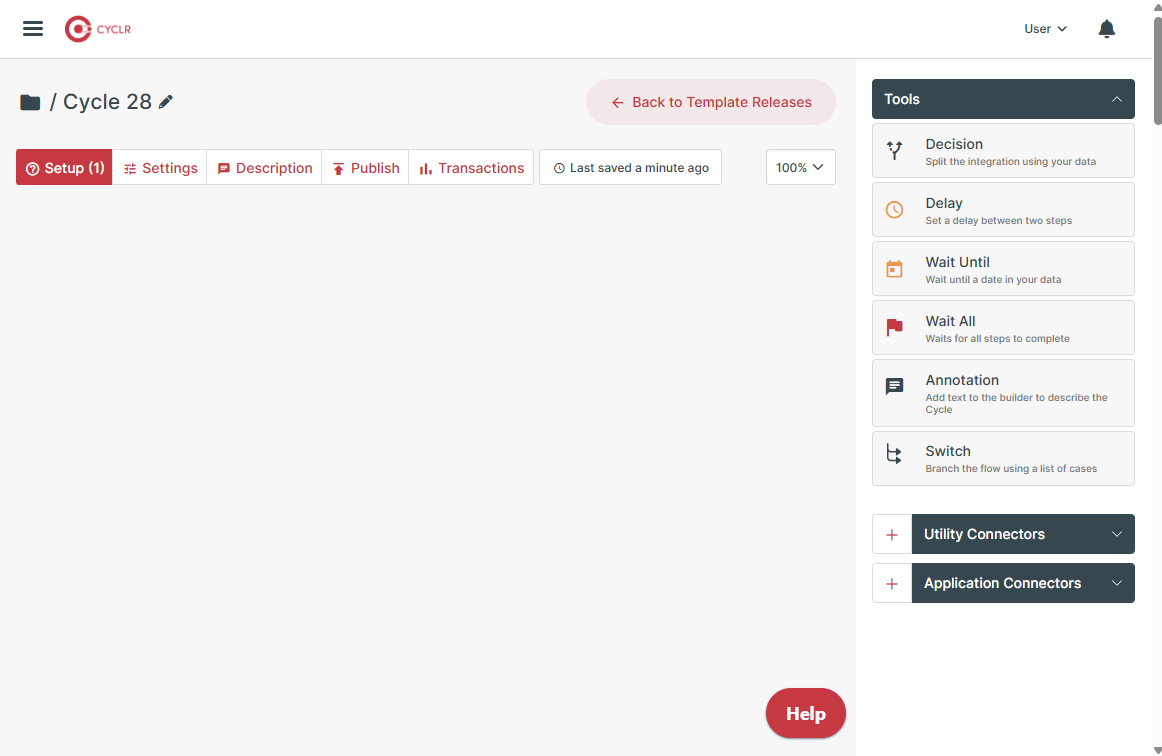
    The Builder Canvas #

    The Builder canvas serves as the primary workspace in Cyclr, where you can build integration templates and cycles. 

    Integration steps are dragged from the sidebar and placed within the canvas area, to connect them to other steps and construct the integration logic. A step may be a Tool such as a Decision or Delay, or it can be a Method form an installed Connector, e.g. a Salesforce “List New Contacts” Method.

    Builder Sidebar #

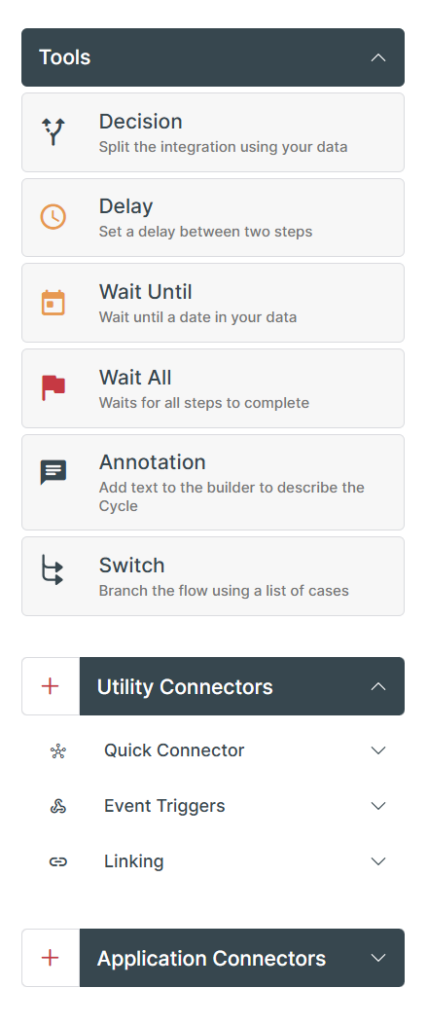
    The sidebar contains all available connectors, including Tools, Utility Connectors, and Application Connectors. These can be dragged and dropped from the sidebar onto the canvas to build integrations that connect to external systems or perform automated logic.

    Note that whilst Tools and Connectivity Tools are immediately available in the sidebar, in order to use Utility Connectors and Application Connectors, they need to be installed on the console first.

    Add a Connector #

    To add a new connector via the Builder, select the + button. You can find one next to both the Utility Connectors area as well as the Application Connectors area to add the respective types of connectors.

    Use the search bar or scroll through the list to locate the desired connector from our library and follow the instructions to install it. Once the installation is complete, you will be returned to the Builder.

    Follow our connector guides for details on how to install specific Application Connectors.

    Connector Methods #

    Connectors contain predefined Methods, referred to as “Steps” when dragged onto the Builder’s canvas, which represent specific actions or data queries. These methods can be expanded by selecting the connector from the sidebar.

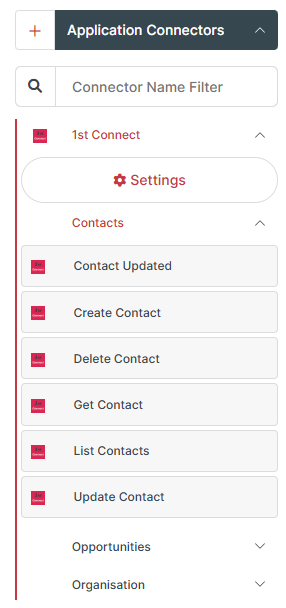
    Methods related to each other are often grouped together under a Method Category.

    Select the connector to expand its Method Categories, and select a Method Category to expand its available methods.
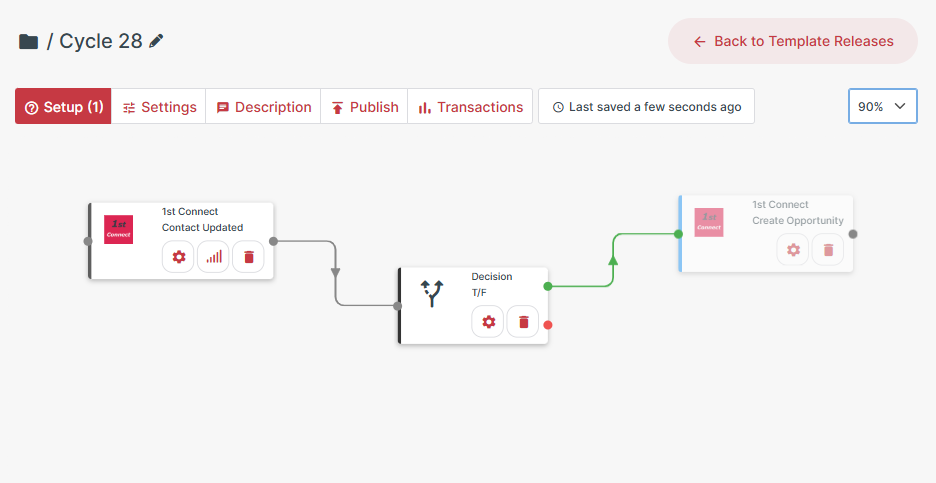
    Steps #

    Steps are functional blocks used to interact with specific areas and datasets within a third-party application.

    To add a Step to your integration, select the Connector Method or Tool from the right of the Builder, and drag it onto the canvas.

    Steps can be connected to define the sequence of actions in an integration. This is done by selecting the output dot on one step and dragging a line to the input dot of the next step.
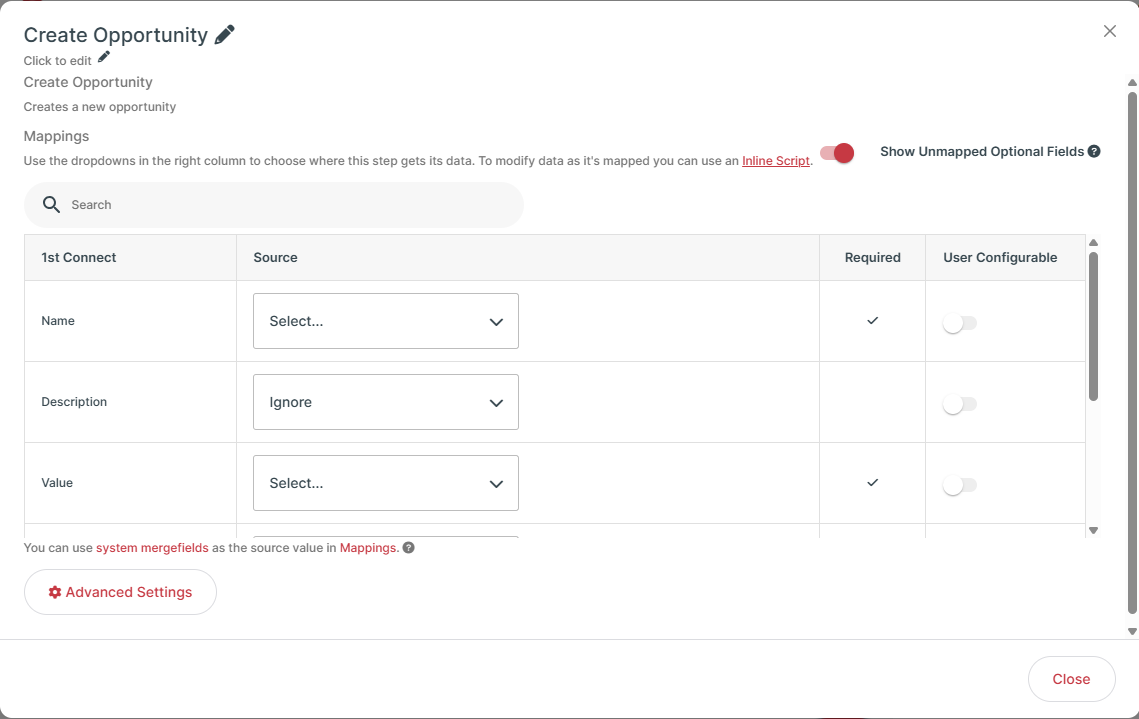
    Step Setup

    To configure individual steps, select the Step Setup cog icon on the step.

    The Step Setup popup can be used to edit the name and description, map fields between different steps, and access the Advanced Settings, such as adding script.

    When editing a Template, you can decide whether to allow your customers to map a field themselves when they install the integration through Cyclr’s Embedding features by toggling the User Configurable setting for that field.

    Settings Bar #

    The Settings bar above the builder canvas provides configuration tools that can be used to determine Template or Cycle specific settings. 

    IconSettingDescription
    Setup The Setup button notifies you of any potentially missing elements in your template. 
    For example, if you don’t map a required field in a step, or combine incompatible steps, the Setup button shows a number of issues. 
    SettingsTo configure runtime settings and other advanced performance options, select the Settings button.
    DescriptionA custom description may be added to help identify the integration’s purpose. This can be set using the Description button.
    PublishTemplates only.

    Once your Template is ready, it can be published for customer use. Before publishing, configure the template’s execution behavior from the Publish button, including whether Custom Fields are copied as part of the installation.
    TransactionsTo see a full view of the data that flows through your integration, select the Transactions button. You can use the transaction data to debug your templates and ensure that data moves as you expect.

    Template Releases #

    Cyclr supports version control for Templates, enabling teams to iterate and manage different versions over time. Template Release information can be accessed directly from the Builder from the “Back to Template Releases” button at the top of the canvas.

    Share This Article :
    • Facebook
    • X
    • LinkedIn
    • Pinterest
    Partner Console DashboardReports
    Page Contents
    • The Builder Canvas
    • Builder Sidebar
      • Add a Connector
      • Connector Methods
      • Steps
    • Settings Bar
    • Template Releases

    Company

    • Company
    • About Us
    • Security and Compliance
    • Pricing
    • Blog
    • Branding
    • Embedded iPaaS

    Legal

    • Website Terms
    • Privacy Policy
    • Terms and Conditions
    • Data Protection Agreement
    • SLA
    • GDPR

    UK Office

    +44 (0) 3300 102 525

    US Office

    +1 (646) 585-2525


    White labelled API integration framework for creating & managing in-app SaaS integrations.

    © 2025 Cyclr. All rights reserved.