Introduction
This guide explains how to obtain authentication details from Creatio, as well as how to install a Creatio Connector.
Setup & Authentication
Overview
Cyclr Partner setup:
Usually no external setup is required by you, the Cyclr Partner, as configuration and retrieval of any credentials for this Connector are performed by your customer within their system.
As a result, the Client ID and Client Secret fields within your Cyclr Partner Console’s Creatio Connector Library entry should be left blank so that they’re displayed each time the Connector is installed and provided by your customer to access their data.
Your customer’s setup:
- If their Creatio instance is on-site (self-hosted), they must deploy the Creatio Identity Service. If it’s hosted by Creatio, the Identity Service is already available.
- Obtain the URL for the relevant Creatio Identity Service.
- Create OAuth 2.0 Client Credentials (a Client ID and Client Secret) within their Creatio instance.
Remote Setup in Creatio – performed by your customer
Within the Creatio instance being accessed, obtain OAuth 2.0 client credentials by following the steps below. See Creatio’s official guide for further details.
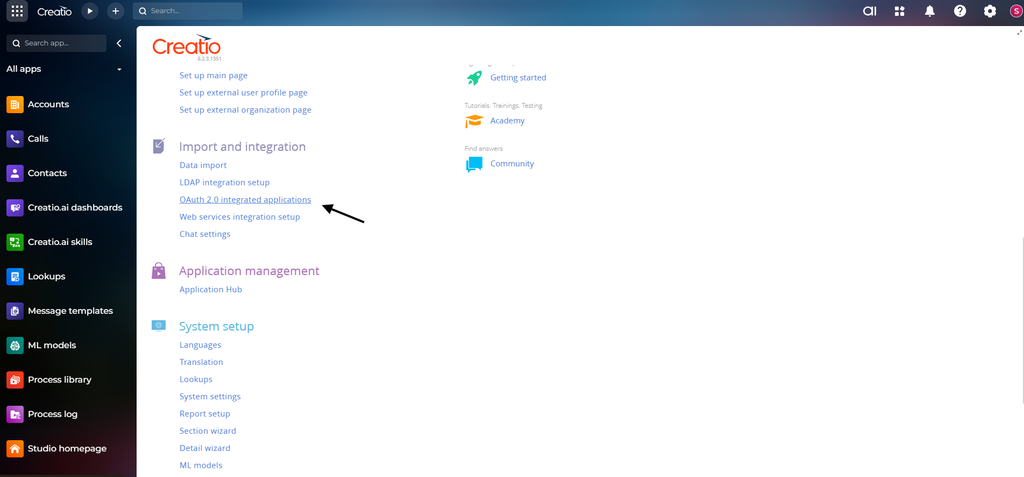
- Open the Creatio System Designer by clicking the cog icon in the top right.
- Open the “OAuth 2.0 integrated applications” page.
- Select “New” in the top right, then follow the steps to create the credentials.
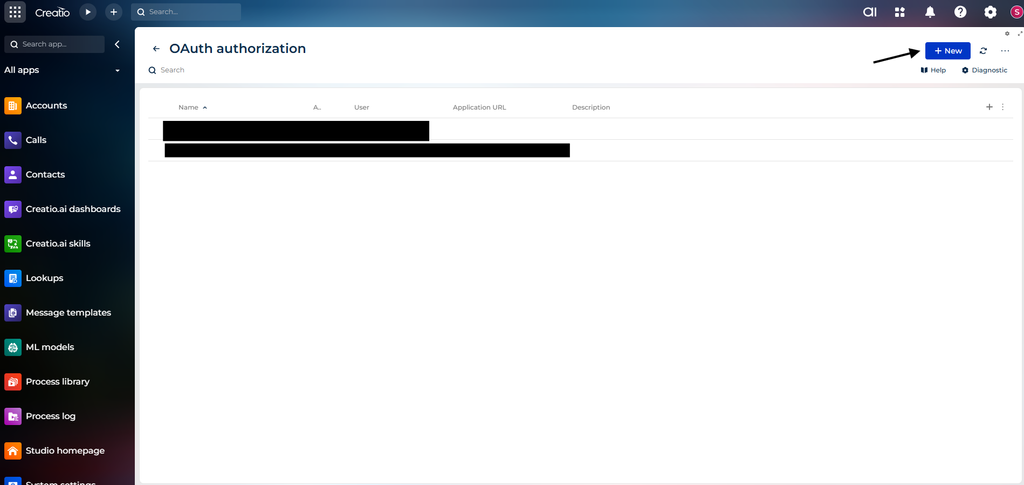
- Once completed, make a note of the new Client ID and Client Secret.
Cyclr Connector Installation
When installing a Creatio Connector, the following values are used:
| Property | Description |
|---|---|
| Client ID | The customer’s Creatio Client ID. |
| Client Secret | The customer’s Creatio Client Secret. |
| Creatio Identity Service URL | The URL to the customer’s Creatio Identity Service, e.g.:https://myinstance-is.creatio.com |
| Creatio URL | The URL to the customer’s Creatio instance, e.g.:https://myinstance.creatio.com |